Creating a new fairy garden

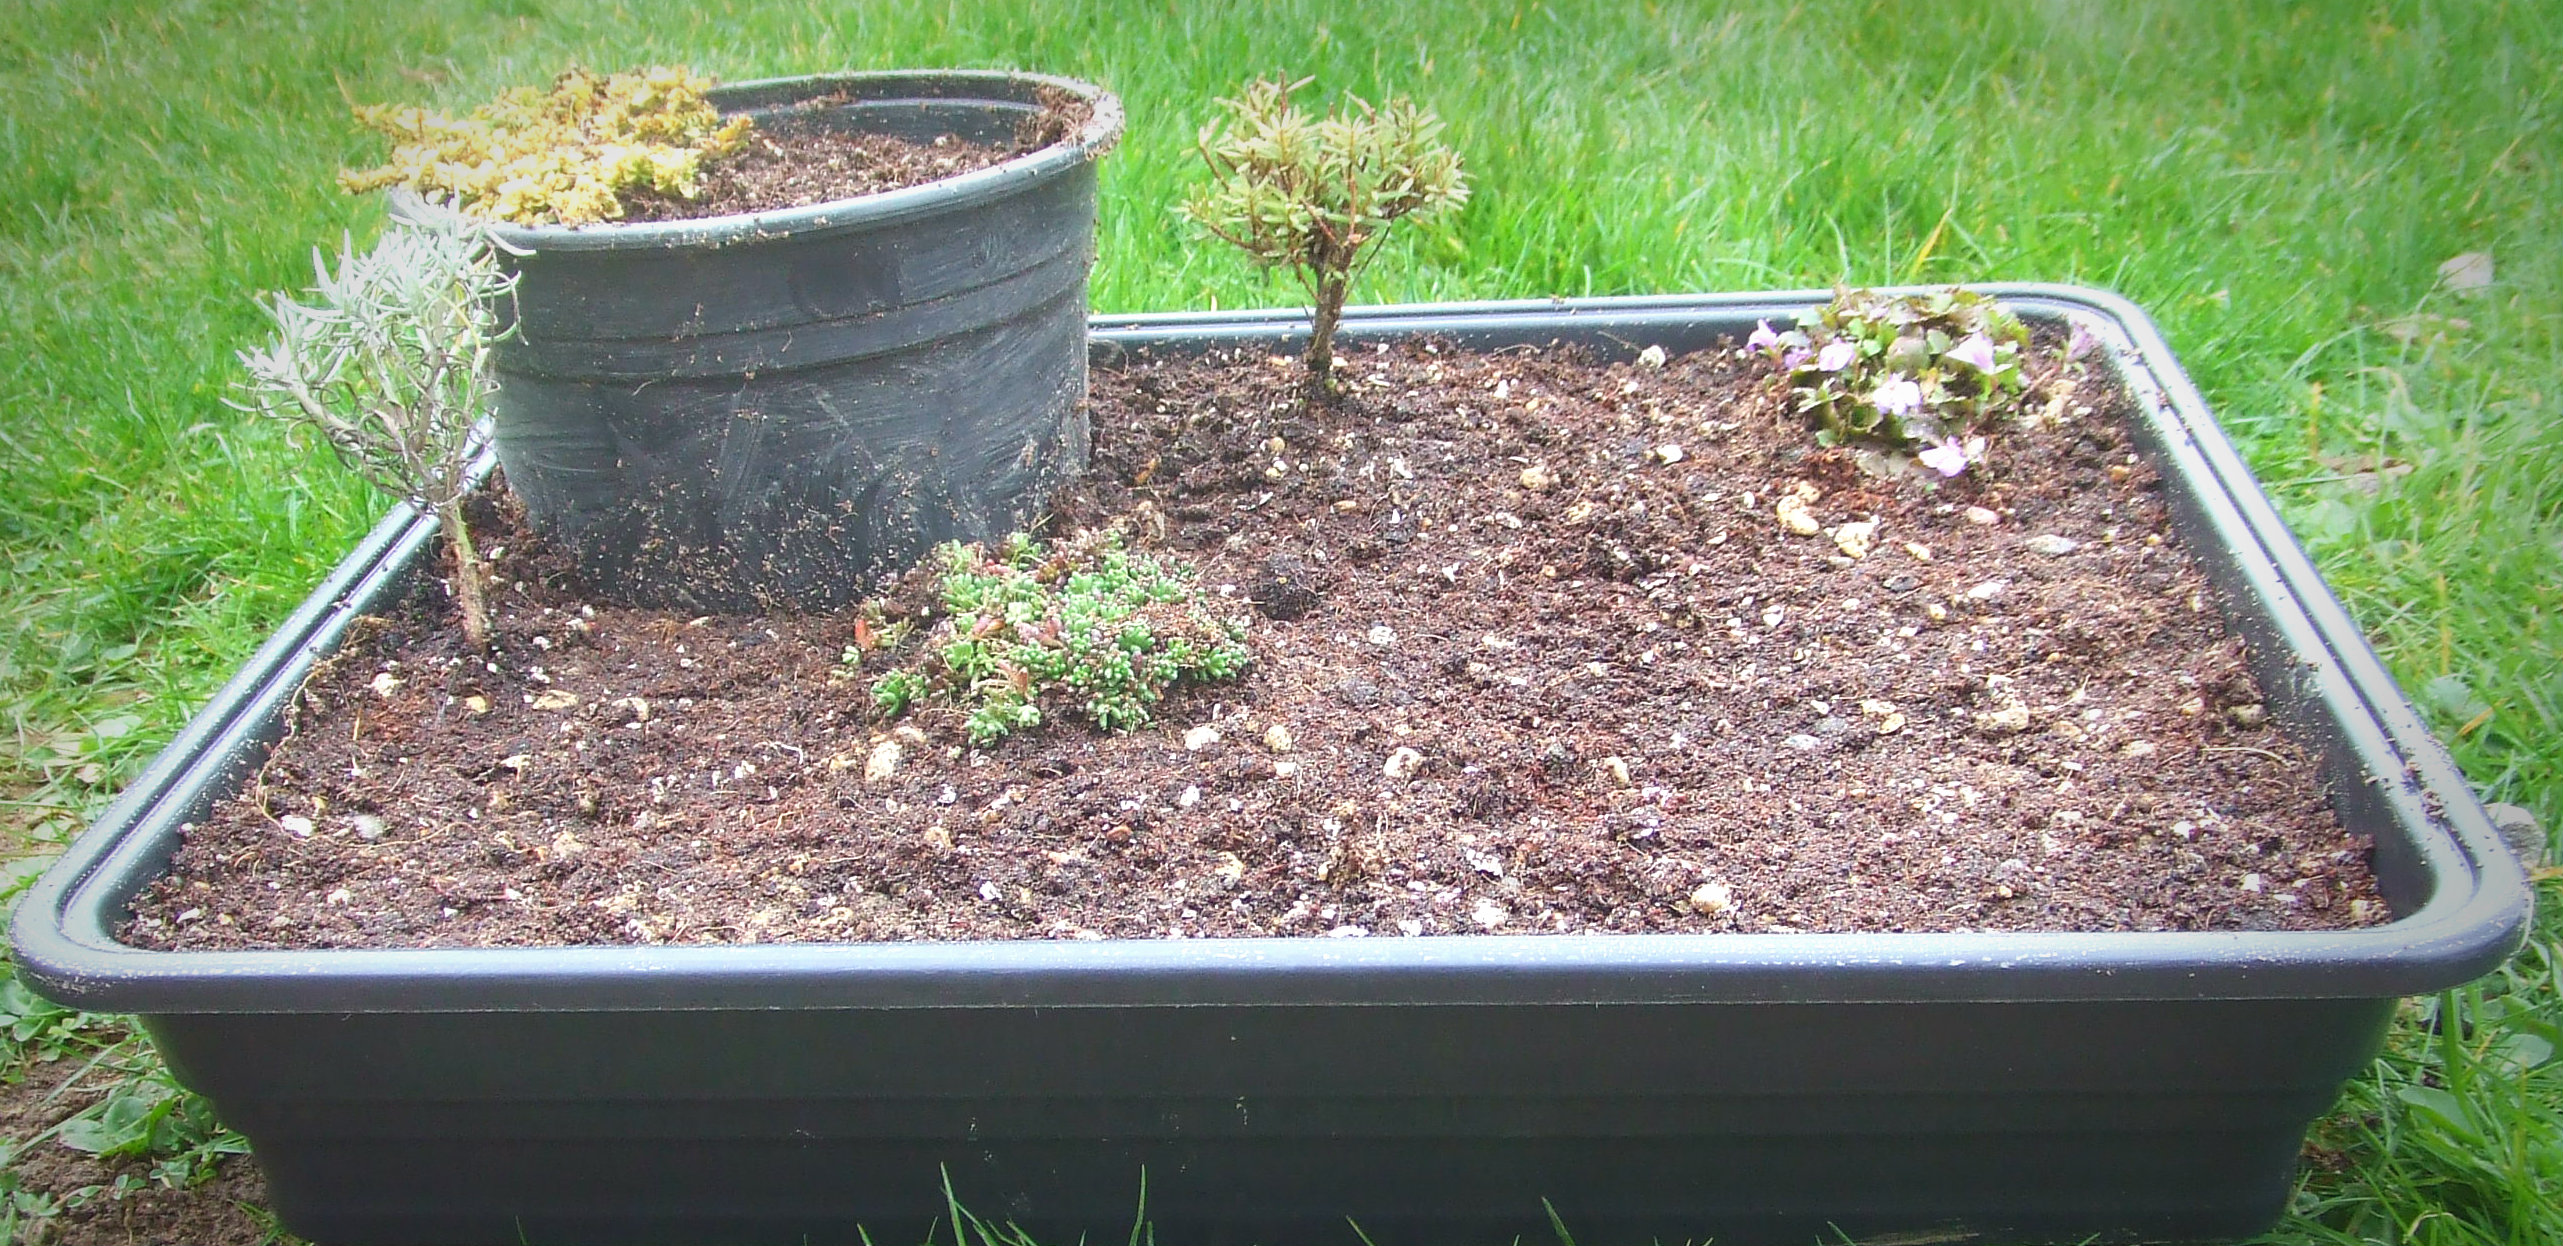
The construction of the fairy garden around the oak tree has begun. I am really pleased with the willow garden edging that I purchased at Poundland, which has saved me making fairy fencing and has also allowed me to raise the soil level around the tree to give some room for the plant roots to grow before running into the roots of the oak tree.

start of garden

I will mainly be growing alpine plants in the garden because they are the right scale for a fairy garden. I researched on the internet to find the best compost to use and they require something free draining. Suggestions to add to regular compost include, gardener’s grit, builder’s concreting sand, peat moss, leaf mould and composted bark. As we have plenty of leaf mould (thanks in no small part to the very large oak tree!) and a very large bag of builder’s sand in the garden this is what I used! I guess we will soon see if it works!

I also found this leaflet from the Alpine Garden Society website http://www.alpinegardensociety.net/pdf_files/publication/AGS-Easy-Composts-Leaflet.pdf

I think I need to raise the levels both inside and outside the border to make it look more like a fairy fence, but this is as far as I got before the rain started pouring down!

Thanks for stopping by

Jackie 🙂

Etsy shop update

Well further to the blog I wrote in February https://sunshinecottagecrafts.co.uk/2016/02/15/etsy-and-ebay/, I have so far been able to exceed my target of adding a couple more items a week and now have 21 items listed for sale in my Etsy shop, with at least another 3 still waiting to be listed. Here is the latest one https://www.etsy.com/listing/272662988/fairy-garden-accessories-starter-set

It does get easier with practice but taking and editing the photos and writing the item description still takes me some time. I am getting more views for my items and hopefully with changing the clocks next weekend and fingers crossed the weather improving, people will be thinking about getting out in the garden and sales will pick up.

I am also going to work on constructing a proper garden around the huge oak tree we have in our back garden which will be great for product photos, so I will keep you updated on progress.

The trunk of the tree before work begins!

oak tree

Etsy and Ebay

Well we are in the middle of February already, I can’t believe how time flies. Since Christmas I have been working on opening online stores, which has taken much longer than I expected and I still have a great deal to learn to improve my shops on both Etsy and Ebay. I was pleased with how sales of valentine’s survival kits went on ebay and I now have to work on producing sleeves for the tins for all of the other survival kits I offer and list those for sale, which is going to take some time as there are more than 20 and then variations within those!! At the moment I have the baby kits listed and wedding kits are next in line!

My Etsy shop was finally opened on Friday (February 12th), I only have 10 listings so far but am hoping to add a couple every week to build up my range. I have joined the Etsy resolution which is provding me with lots of advice on how to make my shop as good as it can be and I am currently working through my lessons!

Here is the link to my shop, please pop over and take a look!

https://www.etsy.com/shop/SunhineCottage

Thanks

Jackie 🙂


January 2016

Happy New Year, although a bit belated!

So far this year I have been beavering away behind the scenes to get my new Etsy shop launched and to have survival kits that I could sell on ebay that would survive the journey through the post. Previously, they were supplied in handmade boxes and I have only been able to sell them at fairs or through local selling pages where people can collect them in person.

I have joined The 100 Day Goal With The Business Bakery, which is helping to keep me motivated and to make sure I make steps towards my goal every day! I would recommend it to anyone who needs motivation to stay on task towards your goal and they have a very supportive facebook group, this 100 days will end in April and before long the next 100 days will start!

The Etsy shop is still a work in progress, but today I put my new Valentine’s survival kits in tins up for sale on Ebay, now that I have the tins in stock I can start designing the sleeves so that all of the current survival kits that I have available can also be sold online!

Hopefully I will be able to keep on top of my website more this year too, maybe my next 100 day goal!!

Jackie 🙂

Stamford Georgian Market

Saturday was my last outdoor event for this year, in Stamford for the Georgian Festival.

georgian stall

We were so lucky as the weather was beautiful, it was a lovely atmosphere and I met lots of lovely customers and stall holders. The stewards and council workers were also very cheerful and helpful, the only downside of the day, for us, was the generator from the food van next to us which made chatting to customers quite tricky! Stamford is such a lovely town and I look forward to taking part in the event again next time!

🙂

September 9th – the making of apron, mob cap and fichu

The costume items are complete and I am really pleased with how it has gone, all three items have been made from a cheap cotton double sheet (that I already had) and I have plenty of fabric left for future needs.

The apron was taken from a corner of the sheet so 2 edges were already hemmed, I hemmed the third side leaving the top for now. The waistband/tie was made from the thicker seem that you get at the top of the sheet, I trimmed very close to the stitching and used the whole length so no sewing was needed here! I then hand stitched the top of the main apron piece with a long running stitch, then gathered it and pinned on the waistband before straight stitching and then zig zagging for strength.

The fichu is a triangle from another corner so again only one edge needed hemming!

Finally the mob cap, I doubled the fabric and drew around a dustbin lid (about 19 inches diameter), I stitched and then zig zagged and left a gap for turning through, once turned to through I marked another circle, about 2 inches from the edge and stitched around twice leaving a small gap on the outer row of stitiching for threading elastic through. Using a safety pin on the end of the elastic I threaded it around the cap, gathered to the size I needed and tied off the elastic. Finally I hand stitched the gap around the edge of the cap. Not a great picture but I will put the whole costume together and get someone to model it for me!!

Jackie 🙂

Jpeg

September 7th 2015

After a busy four months of Summer fairs, where the website has become neglected, things are finally a little quieter and I want to make sure I keep it up to date, so this is the first of hopefully many frequent blogs keeping you up to date with my latest projects and events.

I only have one outdoor fair left and it is the Stamford Georgian festival (Stamford, Lincolnshire). Stall holders have been asked to wear Georgian costume and this is my main project for this week, making a mob cap, fichu (like a neckerchief) and an apron, from a white sheet. I have already purchased a skirt and top, which thanks to a great local charity shop has only cost me £1.50 so far and with a pair of boots my outfit will be complete. So on this lovely sunny morning I am going to get out the sewing machine and start with what I see as the trickiest item the mob cap (which I always thought were called mop caps??) Hopefully it will look something like the picture of one of the dolls below (http://www.carol-anne-dolls.co.uk/dolls.html) I will add pictures and details when I have worked out how I am going to make it, thankfully there is lots of help online!

georgian clothing

Jackie 🙂

Woodhall Spa Country Show

What a fantastic day we had at Woodhall Spa country show this year, it was lovely to meet so many people who had such lovely things to say about the fairy garden display and also talking about their own fairy gardens. It was also lovely to bring back memories for people who had made miniature gardens for school competitions and giving me details about how they made theirs. It does seem that fairy gardens are really taking off and that I am supplying things that people cannot get elsewhere, which is great.
I now have a very busy couple of weeks before the Sleaford Autism Family Fun Day replacing all of the items that were sold on Sunday, so it’s back to mixing concrete for some more lovely fairy doors today, I hope the showers stay away!
These are the fairy doors I still have in stock at the moment, please get in touch if there is something you would like to buy or like me to make!

pale blue pale green pink door (5) red door (3) copper door (3)

Miniature gardens

It has been more work for my miniature gardens and fairy gardens this week, I have painted 2 new fairy doors and completed another bridge and pond as well as a mini grot which was made with some left over concrete
mini grot
I also have my first fairy house curing in a container of water, I am quite excited by this if it works and so have cast my second one today (now setting in the garage), hopefully both will be ready for my first fair at Woodhall Spa on May 17th.
I have also been creating more fairy doors today I planned to make 3 but had enough concrete for 5, so they are also setting in the garage.
On top of these I have plans to make terrariums, for mini indoor gardens and yesterday I had a very successful shopping trip and managed to buy 3 containers. However today I was hoping to gather the rest of the supplies, I could not find the moss or charcoal needed for potting up the containers nor any mini features to add to them after scouring the towns charity and toy shops, so a wasted morning :(. I think I will have to try out of town tomorrow!! Fingers crossed that I can crack on with these soon!

Jackie 🙂

Here’s a picture of what I would like to make
terrarium idea

Miniature gardens

Well, I have a number of Summer fairs booked in now and I am planning the stall, it is going to be quite different this year, with less variation in my product lines and mainly focusing on miniature gardens and fairies. So with this in mind I have been making a growing miniature garden to take with me to show off my products in the best way possible. First I needed to find a container, in the end I have gone for a gravel tray from Wilkinsons, which is large enough to contain the plants and my products. I drilled holes in the bottom for drainage, before adding a layer of gravel and the compost. Next was the plants, most of which are alpines but also a curry plant and a mini conifer which I am hoping to be able to keep trimmed to make miniature trees and I have also added some moss which blew off the roof in high winds (we will see if that grows?)
fairy garden april 4th
Here it is planted up!
The next stage was to cover the soil for this I chose pea gravel as I felt it was small enough, although I could have maybe used aquarium gravel which is even smaller. Then to form the river, which is made up of blue, light green and dark green glass decorative beads (which I got from B and M Bargains).
fairy garden 2
Then it will be time to add the larger features, so yesterday I was in the garage mixing concrete for a pond, 2 bridges and some more fairy doors, these I will need to keep damp for a couple of days before I can move them and put them into the water bath for a week. Fingers crossed they all come out complete!! I am also working on some wooden furniture, so hopefully the next fairy garden blog will be the complete garden, with accessories!
Jackie 🙂